Strips Drip is a LoRaWAN leak sensor. It raises an alarm as soon as water reaches the absorbent pads on its blue plate, and it measures temperature so it can warn before pipes freeze.
In the box
- Strips Drip, with the adhesive already on the back
- The blue pad plate with two absorbent pads, usually separate
- One or two magnets on the sensor. They keep it in transport mode.
- The LoRaWAN keys (DevEUI, JoinEUI and AppKey), on a label in the box and by e-mail
You need
- A LoRaWAN gateway within range, powered on and online
- An account on a LoRaWAN network server, with the gateway added
- The region on the sensor's label. Gateway and network server must use the same region, and in US915 and AU915 the same sub-band.
- The Strips payload decoder in your network server or application
- The Strips LoRa Config Tool, to turn on the leak alarm
From box to ready
Register the sensor in the network server
Add a new end device: OTAA, LoRaWAN 1.0.4, regional parameters RP002-1.0.1 and the frequency plan for your region. Enter the DevEUI, JoinEUI (AppEUI) and AppKey exactly, and add the Strips payload decoder.
Join the network
Take every magnet off the sensor. Hold it by its ends and do not touch the pads along the long sides: it calibrates now. It sends a join request: a short green blink, then one long green blink when joined. Five short red blinks means the join failed: check the keys, region, sub-band and gateway.
Fit the pad plate and check the signal
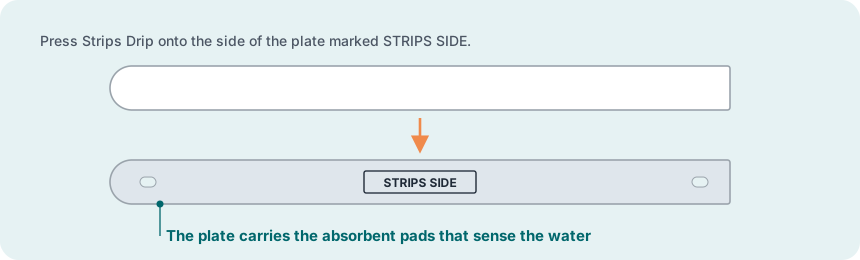
Straight after the join, peel the film off the adhesive on the back of Strips and press it onto the side of the plate marked STRIPS SIDE. Then hold the sensor where it will go and send an uplink: magnet to the rounded end three times, 20 cm away and 2 seconds apart.
Turn on the leak alarm
From the factory, Strips Drip sends only a daily heartbeat. In the Strips LoRa Config Tool, choose Strips Multi-sensor +Drip and the profile "Liquid Leak and Frost Alarm". Send the payload as a downlink on port 11, then send an uplink with the magnet so that Strips picks it up.
Mount it within two hours of the join
Place it where water collects first: flat on the floor under sinks, dishwashers, washing machines, pipe joints and boilers, or at the lowest point of a cellar. Lay it loose with the pads down, use the adhesive under the plate (surface clean, dry, at least +10 °C), or flat-headed screws through the holes at each end. Then set up an action in your application for a leak alarm: a notification, or a valve that closes.
More in the full manual
Settings, troubleshooting, maintenance and specifications are in the Strips Drip for LoRaWAN manual.
Support: support@sensative.com