Strips Drip 800 is a Z-Wave leak sensor. It raises an alarm as soon as water reaches the absorbent pads on its plate, and it measures temperature so it can warn before pipes freeze.
In the box
- Strips Drip 800, with the adhesive already on the back
- The pad plate, separate. Some variants come with it fitted.
- A magnet on the sensor, which keeps it asleep until you start
You need
- A Z-Wave controller (gateway or hub) and its app, within range. Use S2 security if the controller supports it.
- The QR code on the back of the sensor, for SmartStart
- A small magnet for commands later. Any small, strong magnet works.
From box to ready
Join the Z-Wave network
In the controller app, choose SmartStart (or "add with QR code"), scan the QR code on the back of Strips and take the magnet off. Without SmartStart: put the controller into add mode, then take the magnet off. Hold the sensor by its ends and do not touch the pads along the long sides: it calibrates now.
Fit the pad plate
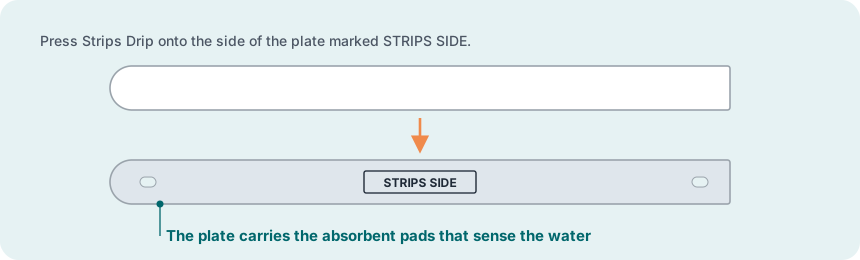
Straight after joining, peel the film off the adhesive on the back of Strips and press it onto the side of the plate marked STRIPS SIDE. If the plate came fitted, go on.
Check the signal where it will sit
Hold the sensor where it will go and do a wake-up: magnet to the rounded end, wait for the blink, move it away. Three times in total.
Mount it within two hours
Place it where water collects first: flat on the floor under sinks, dishwashers, washing machines, pipe joints and boilers, or at the lowest point of a cellar. Lay it loose with the pads down, use the adhesive under the plate (surface clean, dry, at least +10 °C), or flat-headed screws through the holes at each end.
Set up the alarm
The leak alarm is on by default. For freeze warnings, set setting 6 (Temperature alarms) to On. In the controller, set up an action for a leak: a notification, or a valve that closes. To test, wait at least five hours after the join, put a little water on the pads, then dry them with a cloth.
More in the full manual
Settings, troubleshooting, maintenance and specifications are in the Strips Drip 800 for Z-Wave manual.
Support: support@sensative.com